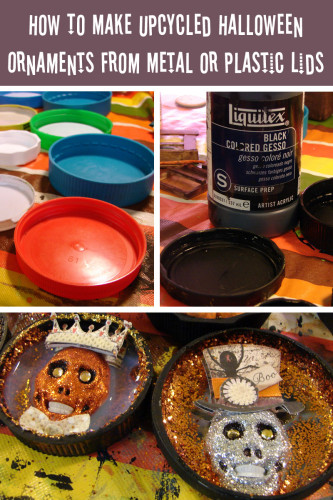
- Step 1: Collect Materials
I always save up a bunch of random lids from all sorts of containers: pasta jars, beer bottles, mayonnaise jars, peanut butter jars, etc. Some lids are metal and some are plastic. All sizes will work.
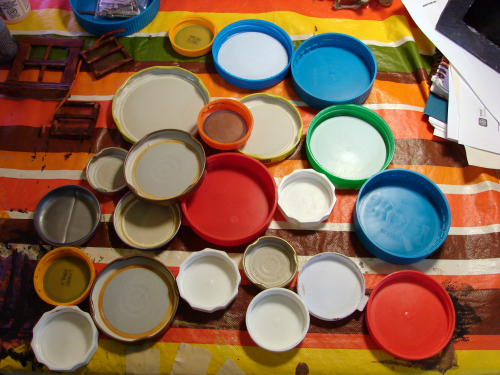
Raid your recycling bin for lids of all shapes and sizes. - Step 2: Paint the Lids
Paint the lids with a primer and your chosen paint color. I used black gesso for my primer and skipped the paint layer. You could also use spray paint. Don’t forget to paint the sides and back. Give it at least two coats because paint easily chips off of metal. For best results you might want to lightly sand the lid to create a “tooth” for the primer to grab onto. I, of course, skipped this step.
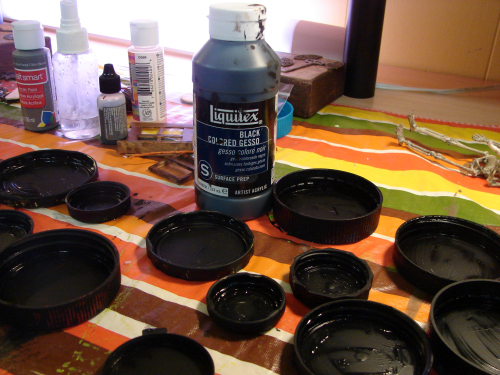
The lids are painted with black gesso and are drying. - Step 3: Choose Your Embellishments
I snagged a bunch of cool scrapbook embellishments from Michael’s craft store on sale just after Halloween. They were probably about 70% off so I bought a ton of them. I also used skull charms, skull beads, miniature pumpkins, and bones I made from clay. Just about anything will work. Try your local dollar store for small, cheap trinkets.

My haul from Michael’s: stickers and scrapbooking embellishments. 
Shop those sales! - Step 4: Glue Those Suckers Down
The stickers simply peel off and stick to the lids but for a more secure bond, glue them down with tacky glue, matte medium, or mod podge. You can also use resin, 3D Crystal Lacquer or Diamond Glaze to create a shiny embedded look.
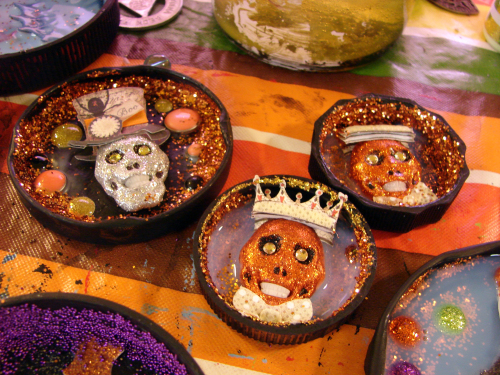
The lids are filled with embellishments and covered with Diamond Glaze which dries clear. - Step 5: Add Ribbon for Hanging
Glue ribbon around the ornament, leaving a loop at the top for hanging. Start and finish the ribbon application at the ornament’s bottom. Choice of glue is important: tacky glue or white glue bleeds through most ribbon, making a splotchy look. If you use this glue, be sure to spread it evenly around the rim of the lid so that it bleeds through evenly. Matte medium is not sticky enough to hold the ribbon in place long enough to bond so I wouldn’t recommend using it. I’ve also tried E-6000 but it bleeds through as well.
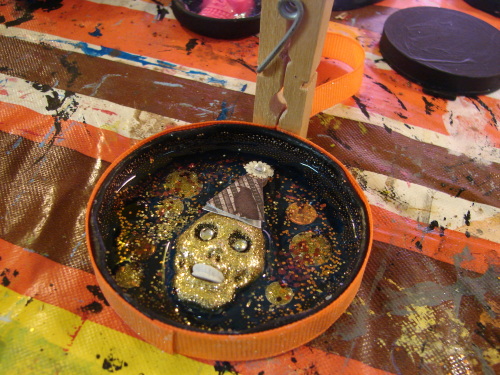
I’ve clipped the ribbon together with a clothes pin while it dries. - Step 6: Finish the Back
I like to decorate the back of the lid to cover any imprinted labeling and also just to make it look even more pretty. You can do this any way you want but I like to dribble on some varnish sealer and then sprinkle on glitter. You could also use stickers or punched paper attached with mod podge.
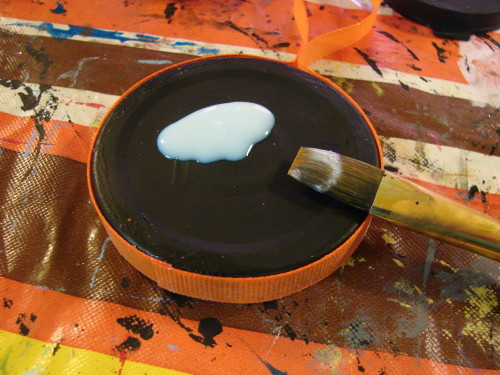
I dumped on some varnish… 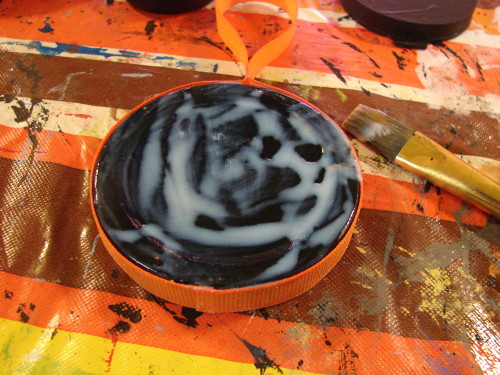
I spread out the varnish with my paint brush. 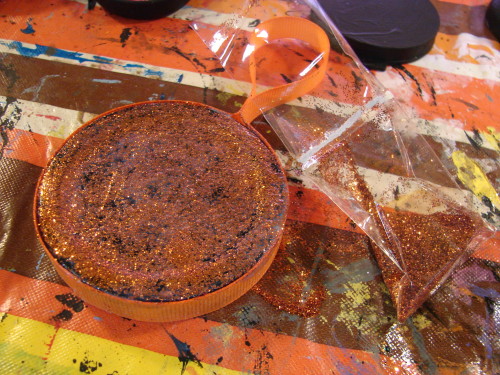
Sprinkle glitter on the wet varnish and allow to dry. - Step 7: Hang and Admire!
Hang up your ornament and admire your work!
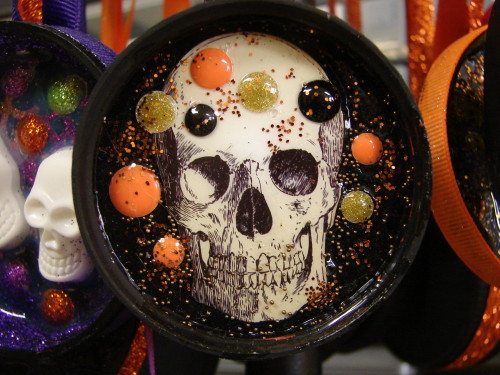
Upcycled Halloween Ornament Made From Metal and Plastic Container Lids
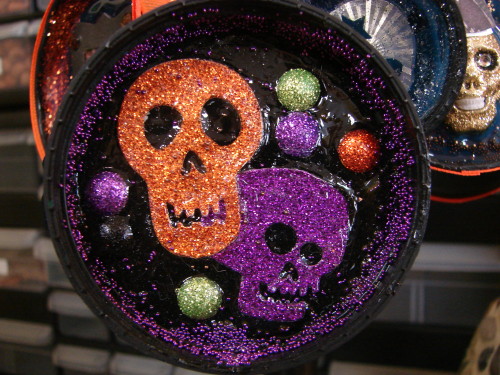
Upcycled Halloween Ornament Made From Metal and Plastic Container Lids
Inspiration
Check out my Pinterest board below for beaucoup craft ideas and inspiration for making your own recycled metal lid ornaments.
[…] How to Make Upcycled / Recycled Metal Lid Halloween Ornaments […]